CMake and IDE setup
This tutorial really does not bring anything new in the meaning of code. Basically we have copied
all source files from the previous post and put them under hw and src folders.
But we also added one small file called CMakefile.txt that dramatically changes the way of how you think
about building C/C++ projects.
The good practice when you building CMake project is to create a separate build directory and start cmake utility from there. This method is called “out of source build”. A significant advantage of this method is that this way you keep intact all your source codes and all object or temporary files will be created in a separate folder. As a side, for instance, you can use Qt Creator during normal development workflow, but when, for some reason, you want to see the raw output from build tools you can build the project from command-line.
Building CMake projects using QtCreator
There are a lot of IDEs which you may use during this course. But, from our perspective, the easiest one to set up will be Qt Creator.
- Download and install most recent distribuption of QtCreator using link http://www.qt.io/download/.
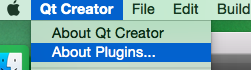
After installation finished, run Qt Creator and navigate to
About Plugins…menu.
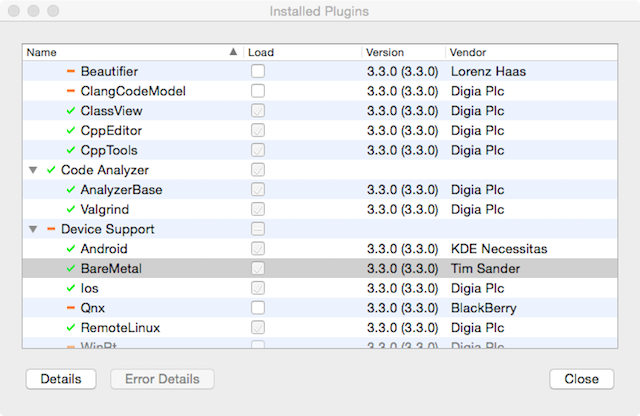
- In opened dialog “Installed Plugin” under
Device Supportsection selectBare Metalplugin if it is not already selected.
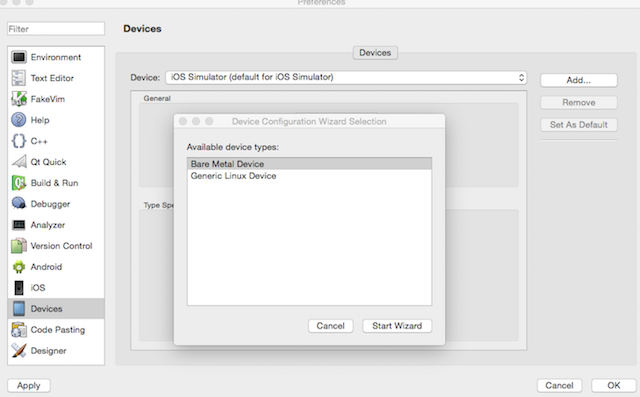
- Navigate to
Preferences/Devicesand clickAdd…button. Then in Device configuration Wizard selectBare Metal Deviceand hitStart Wizardbutton.
- In the wizard dialog you need to type a few settings in.
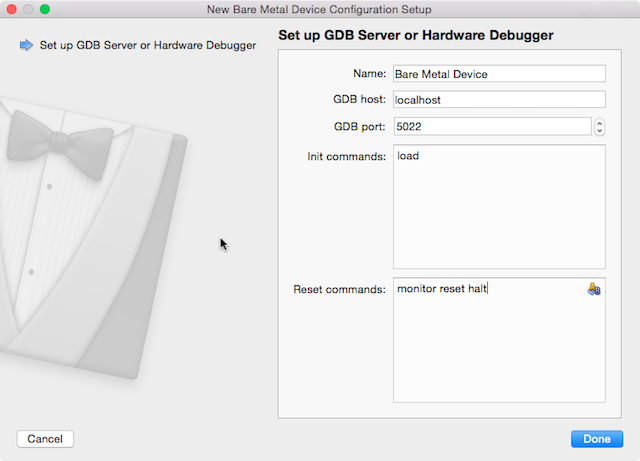
These are GDB Host which need to be set to localhost. GDB Port - 5022.
Initial script is a list of GDB commands which will be executed right after
arm-none-eabi-gdb command connect to GdbServer. So for this project it will be
   load %{DebuggedExecutable:FilePath}
   break reset_isr_handler
The reason why break point is added to the script is because QtCreator automatically continues program execution upon startup. Reset commands script at this moment should be:
monitor reset haltYou can change all of this settings later in Preferences/Devices dialog.
- Navigate to
Build and Run/Debuggerssection and manually addarm-none-eabi-gdbexecutable to the list of available debuggers.
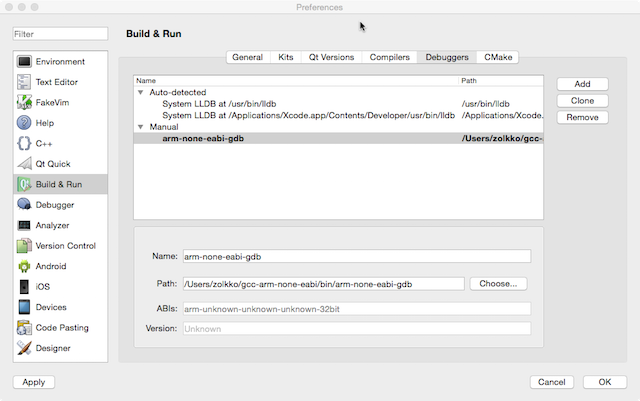
Recent QtCreator versions, in order to make debugging work properly, require GDB been built
with python scripting support. So you may need to use arm-none-eabi-gdb-py executable
instead of arm-none-eabi-gdb.
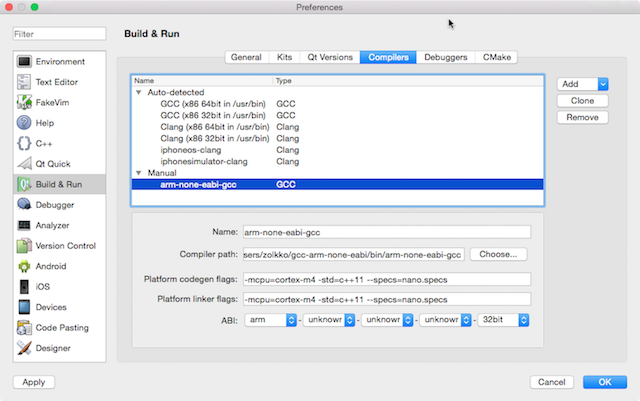
- Switch to “Compilers” tab and add new
arm-none-eabi-gcccompiler as follows:
- Define new “Bare Metal Cortex-M” kit on the “Kits” tab.
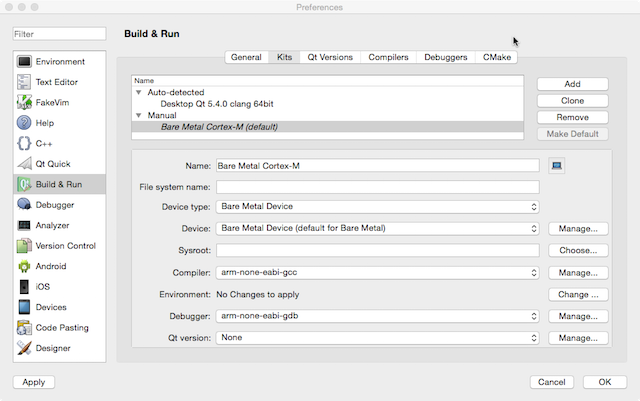
Despite that during this course we going to use CMake as our primary build system, specifying the compiler and Kit are required steps to make Qt Creator’s debugging GUI feature works. You may also mark the newly added Kit as default one.
- Navigate to “Open File or Project” menu and choose CMakeLists.txt in file browser.
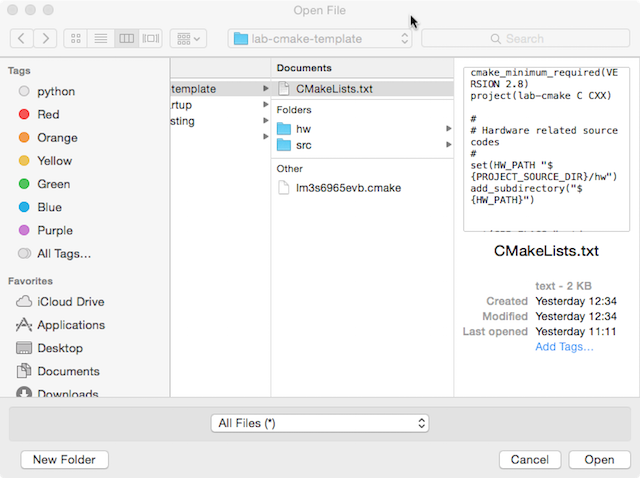
Right after you have opened
CMakeFiles.txttheRun CMakedialog will be shown. You have to provide at least one argument:-DCMAKE_TOOLCHAIN_FILE=~/projects/embedded-course/cmake-project/lm3s6965evb.cmake
It tells to CMake which toolchain will be used during build process. If
your arm-none-eabi installation is not on the PATH, then you can also add argument:
-DTOOLCHAIN_PATH=~/gcc-arm-none-eabi/bin/One more available option is -DQEMU_PATH= should point to a directory where
your qemu-system-arm executable is located. For example:
-DQEMU_PATH=~/qemu-arm/bin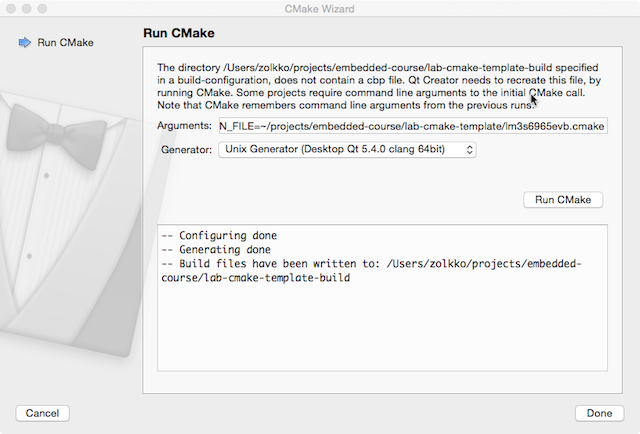
If you did everything correctly then executing CMake will produce necessary Make files
under cmake-project-build directory. All build artefacts will be created in this
directory as well.
By default Qt Creator sets
Qt Kitfor all imported CMake projects. Thus debugging will not work unless you setBare Metal Contex-Mkit as one to use within. In order to do this navigate to theProjecttab and add the kit. You also may want to removeQt Kitfrom project settings so it does not disturb you.
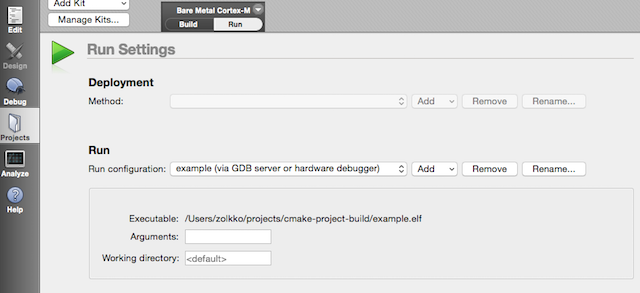
As you can see on the picture bellow, the run configuration is also has to be changed to
Run custom executableand it executesmake runcommand in a new terminal window.
From this point you can build and run the project in the same manner as you would do it with any other type of projects.
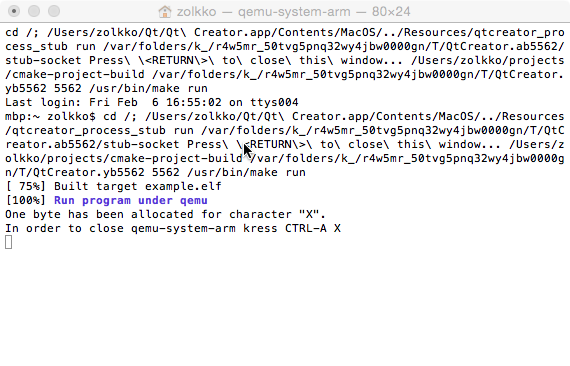
This screenshot illustrate the result of program execution.
Step which you need to take in order to setup debugging a little bit different. You need to add to additional run configuration at first.
Than you will need to manually start Qemu GdbServer. To make this step simpler a custom build target was added to CMakeLists.txt which shapes correct command line and then executes qemu-system-arm. So in a terminal you need to go to the “cmake-project-build” directory and run following command:
make gdbserverUnfortunately currently qemu-gdbserver does not support “monitor reset” command for Bare Metal targets, so you will need to restart gdbserver every time you want to restart your debugging session.
And also please note that to gracefully terminate qemu you need to press CTRL-A X key sequence.